Some PowerVC 2.1.0 and
2.1.1 Troubleshooting Tips and Tricks
I’ve been working with PowerVC 2.1.x recently. I’ve observed a few anomalies along the way, so I thought I’d share some of my troubleshooting tips and tricks. I hope it helps someone, somewhere!
1. VM deploy failure on a
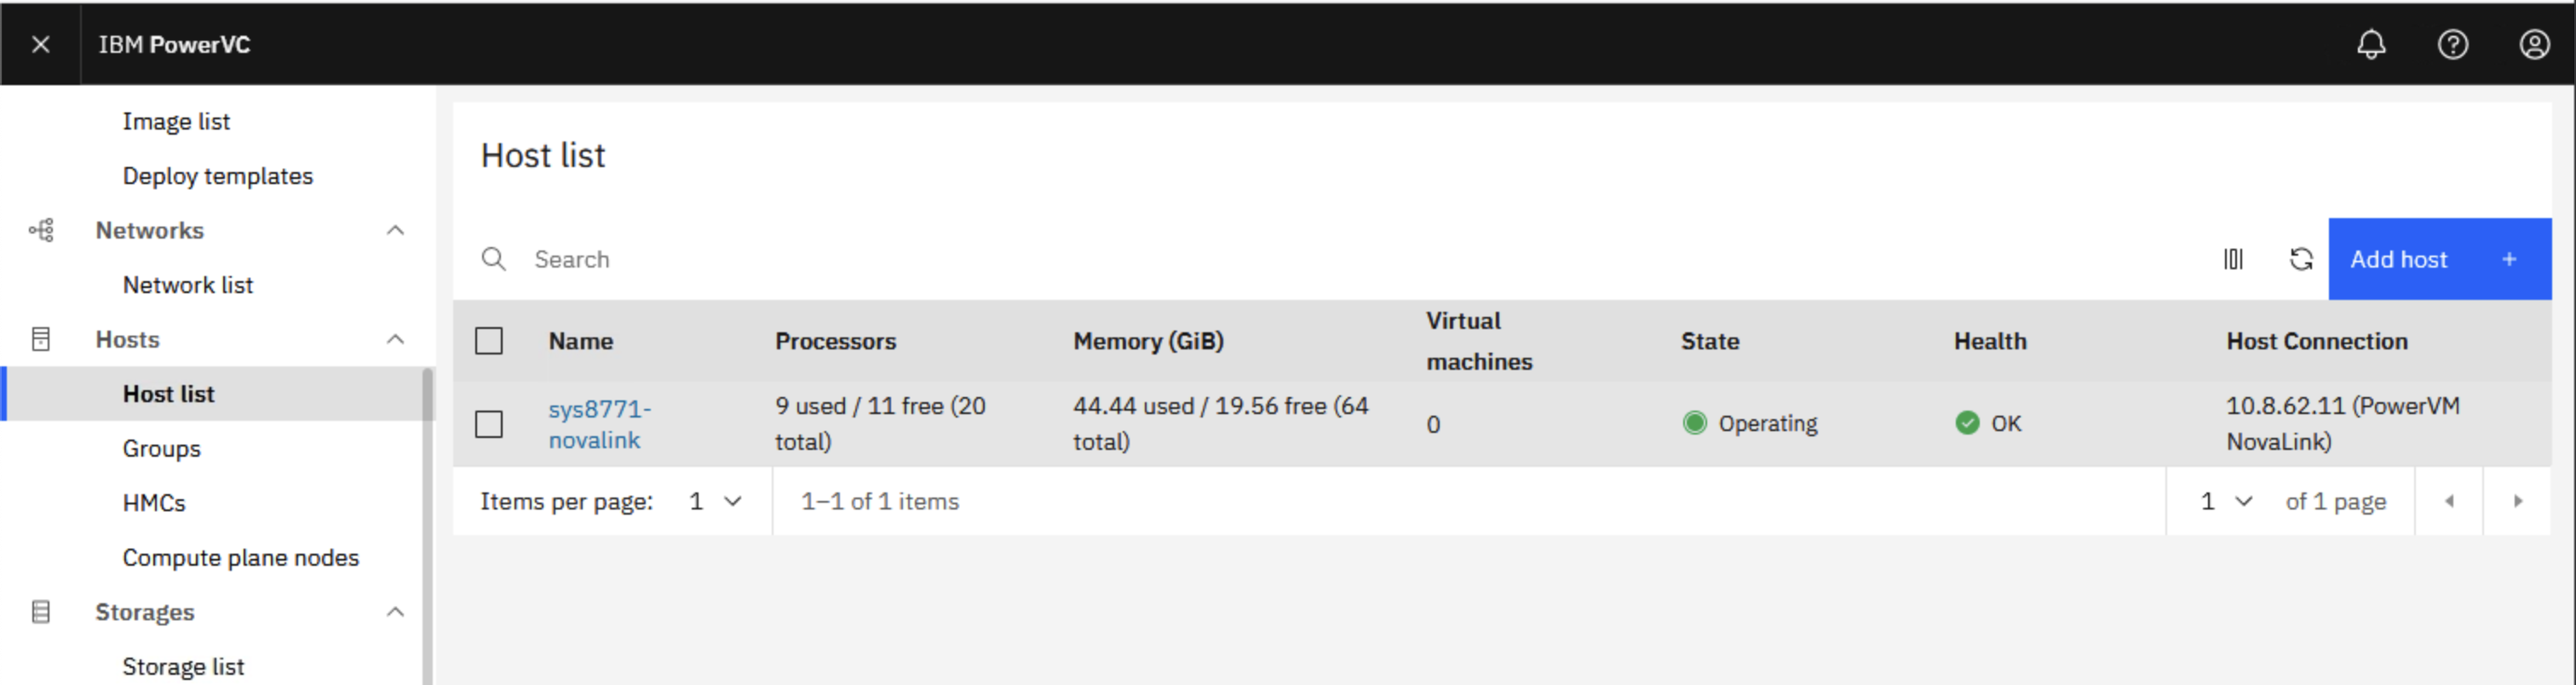
Novalink managed host.
2. VM import error PD-B000012
"Duplicate entry".
3. Shared Storage Pool
Validations Failed
4. Network not listed in
“Create deploy template from….”.
5. SSP snapshot volumes are
not deleted by PowerVC
6. Novalink 2.1.0 network
setup issues.
-----
1.
VM deploy failure on a Novalink managed host.
The VM deploy was failing because the Nova agent was in a "Stopped" state on the PowerVC server.
Nova agent state
of Host
'828422A_216BE5V'
is 'Stopped'

The VM Health state remained in a pending state (Orange). For all VMs.
New VM deploys were partially successful, i.e., VM created and storage deployed, but would hang on boot at LED CA00E105 (this LED means “Transfer control to the operating system (normal boot)”. These were Linux VMs and they were booting the Linux kernel OK and then hanging after the grub loader).
To resolve this, we ran the following on the PowerVC server: powervc-services health restart.
e.g.
# powervc-services
health restart
Stopping
health services...
Cleaned
up powervc-neutron-ibm-health on 10.8.62.101
Set
'powervc-neutron-ibm-health' option:
id=powervc-neutron-ibm-health-meta_attributes-target-role name=target-role value=Stopped
Cleaned
up powervc-nova-ibm-health on 10.8.62.101
Set
'powervc-nova-ibm-health' option:
id=powervc-nova-ibm-health-meta_attributes-target-role name=target-role value=Stopped
Cleaned
up powervc-cinder-ibm-health on 10.8.62.101
Set
'powervc-cinder-ibm-health' option: id=powervc-cinder-ibm-health-meta_attributes-target-role
name=target-role value=Stopped
Checking
status of powervc-cinder-ibm-health
Checking
status of powervc-nova-ibm-health
Checking
status of powervc-neutron-ibm-health
Starting
health services...
Set
'powervc-cinder-ibm-health' option: id=powervc-cinder-ibm-health-meta_attributes-target-role
name=target-role value=Started
Set
'powervc-nova-ibm-health' option:
id=powervc-nova-ibm-health-meta_attributes-target-role name=target-role value=Started
Set
'powervc-neutron-ibm-health' option: id=powervc-neutron-ibm-health-meta_attributes-target-role
name=target-role value=Started
# powervc-services
health status
+----------------------------+-------------+
|
service_name | 10.8.62.101
|
+----------------------------+-------------+
|
powervc-cinder-ibm-health | Started |
+----------------------------+-------------+
|
powervc-nova-ibm-health | Started |
+----------------------------+-------------+
|
powervc-neutron-ibm-health | Started |
+----------------------------+-------------+
The Health status of the Host will report as Attention when this situation exists.

Clicking on the Host and then clicking on the i icon (next to Attention) will show you the ‘Stopped’ message.

2.
VM import failure error PD-B000012 "Duplicate entry".
We only observed this issue with PowerVC 2.1.1.
The error (below) was reported when we tried to import a VM.
PD-B000012 The management operation failed for virtual
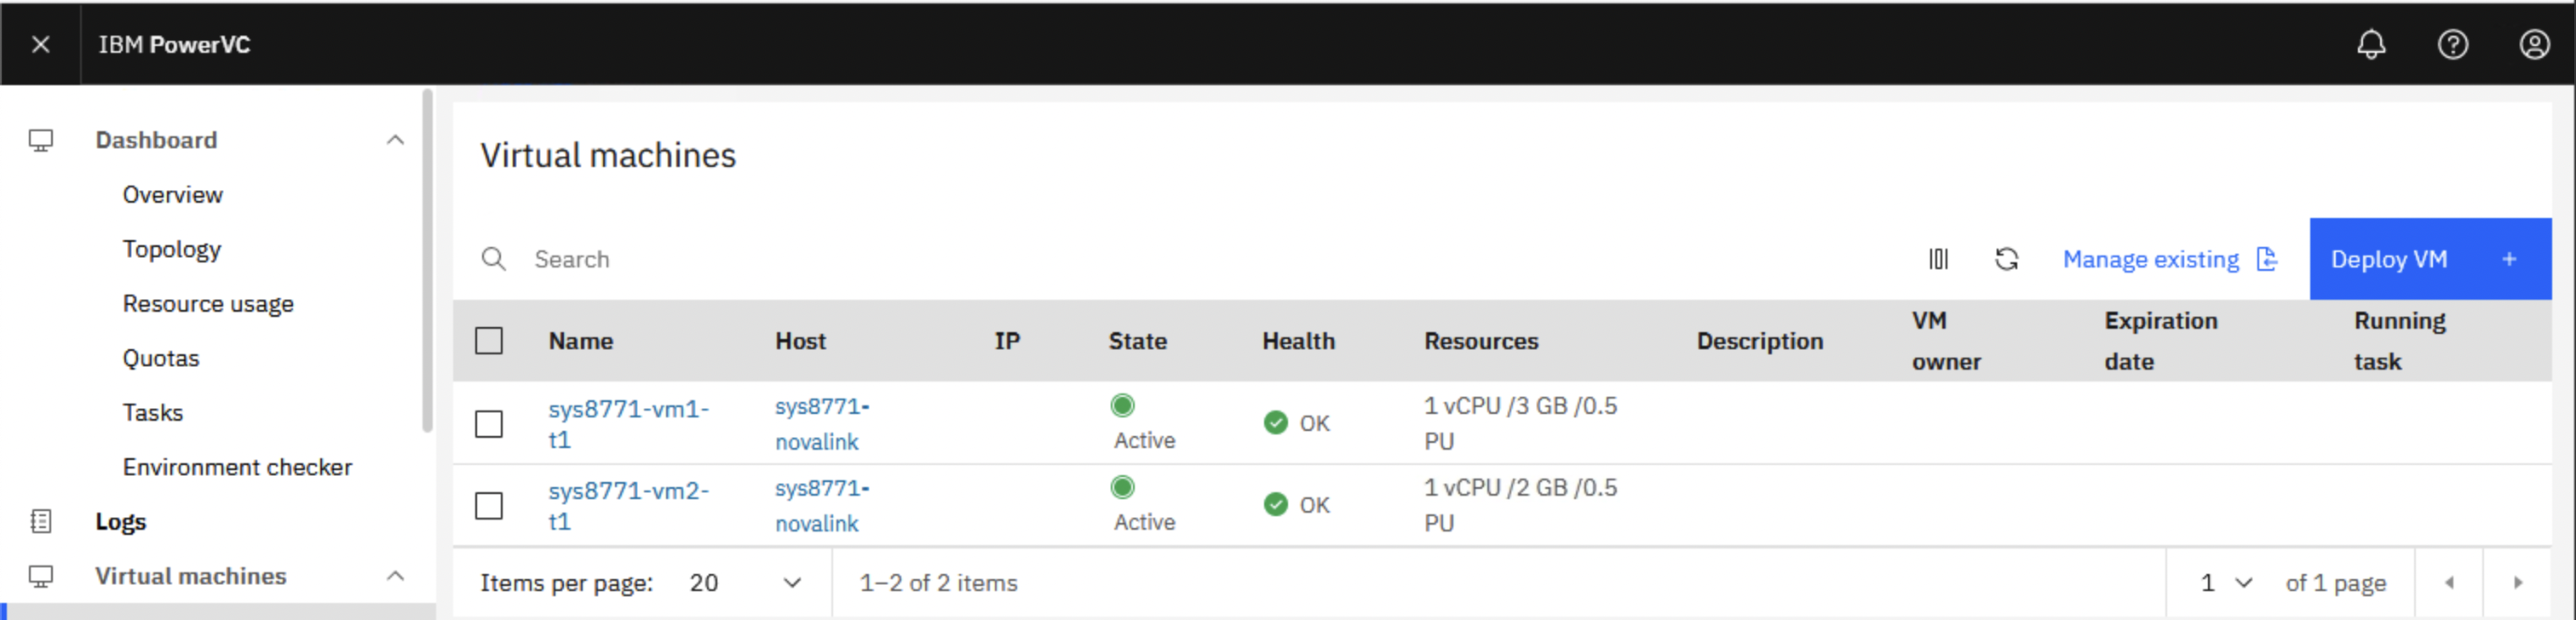
machine sys8771-vm2-t1 on host sys8771-novalink. The following error occurred:
(MySQLdb._exceptions.IntegrityError) (1062, "Duplicate entry
'1bbdaa12-3dd9-491e-a265-375be9404b2b' for key 'uniq_instances0uuid'")
[SQL: INSERT INTO instances (created_at, updated_at, deleted_at, deleted, user_id,
project_id, image_ref, kernel_id, ramdisk_id, hostname, launch_index, key_name,
The recommended workaround was to clean up the PowerVC database using the purge function.
https://www.ibm.com/docs/en/powervc/2.1.1?topic=commands-database-maintenance
For example:
In our environment, we had just converted a HMC managed server to a Novalink managed server in PowerVC. We were using Shared Storage Pools (SSP) as the Storage Provider in PowerVC. The following steps were performed to resolve the issue:
a. Unmanage all VMs in PowerVC
b. Stop PowerVC
# powervc-services
stop
c. Start PowerVC
# powervc-services
start
d. The SSP Health status changed to green (healthy), after a few minutes for all SSP storage providers at this point.
e. We ensured the Host and the Storage providers were healthy before moving onto the next step. This took a few minutes, so be patient.
f. We ran the PowerVC dbpurge operation to remove the soft deleted table rows from the PowerVC database (we could safely ignore the nova error message):
# /opt/ibm/powervc/bin/powervc-manage
-o dbpurge --older-than-days 2 -y
******************************
Performing DB Purge
on tables deleted before 2 days
Deleting cinder's
tables
Deleting nova's
tables
There is an error
occurred while purging nova database.Please check the nova logs for details
Deleting clerk's
tables
Purging taskflow
tables
Completed DB Purge
g. Next we imported the existing VMs, using Manage existing. Then all was well.
3.
Shared Storage Pool Validations Failed
We observed this issue with PowerVC 2.1.0 and 2.1.1.
We noticed that the Environment Checker reported failures for our SSP storage providers, but this doesn’t appear to cause any issues deploying and managing VMs. We assumed it was a bug, and we were correct.

![]()
The failures appear to be related to the following error:
# cd
/var/log/ttv-validation/validators/
# grep
ERROR ssp_validator.log
2023-08-08 16:25:21,935 -
powervc_ttv.utils.utils -
ERROR - ssp_details.py file not found on Novalink master node
2023-08-08
16:25:21,936 - powervc_ttv.utils.utils - INFO - Final Result is:-> {"ValidationResult":
{"ValidationID": "SSP_VALIDATOR",
"ValidationStatus": "Success", "Description":
"Shared Storage Pool Validations", "TargetedResourceType":
"ssp", "IpAddress": "", "refs": [],
"ValidationDetail": {"ChecksList": [{"ip":
"10.8.62.11", "msg": "An exception occurred while
performing validations. Please check the log
</var/log/ttv-validation/validators/ssp_validator.log> for more
details.", "refs": [], "msg-id":
"NOVALINK_CLUSTER_SSP_CONFIGURATION", "MsgSubstitutes":
"", "status": "fail", "Verbose":
"", "val_check_id": "SSP_VALIDATION_ERROR"}]}}}
2023-08-08 20:10:25,887 -
powervc_ttv.utils.utils -
ERROR - ssp_details.py file not found on Novalink master node
2023-08-08
20:10:25,887 - powervc_ttv.utils.utils - INFO - Final Result is:->
{"ValidationResult": {"ValidationID":
"SSP_VALIDATOR", "ValidationStatus": "Success",
"Description": "Shared Storage Pool Validations",
"TargetedResourceType": "ssp", "IpAddress":
"", "refs": [], "ValidationDetail":
{"ChecksList": [{"ip": "10.8.62.11",
"msg": "An exception occurred while performing validations.
Please check the log
</var/log/ttv-validation/validators/ssp_validator.log> for more
details.", "refs": [], "msg-id": "NOVALINK_CLUSTER_SSP_CONFIGURATION",
"MsgSubstitutes": "", "status": "fail",
"Verbose": "", "val_check_id":
"SSP_VALIDATION_ERROR"}]}}}
</var/log/ttv-validation/validators/ssp_validator.log>
for more details.", "refs": [], "msg-id":
"NOVALINK_CLUSTER_SSP_CONFIGURATION", "MsgSubstitutes":
"", "status": "fail", "Verbose":
"", "val_check_id": "SSP_VALIDATION_ERROR"}]}}}
The temporary fix for this error, ERROR - ssp_details.py file not found on Novalink master node, is to modify this script, /usr/lib/python3.9/site-packages/powervc_ttv/resources/SSPResource.py, as follows:
# diff
SSPResource.py.orig SSPResource.py
74c74
< rhel_path =
"/usr/lib/python3.6/site-packages/" \
---
> rhel_path = "/usr/lib/python3.9/site-packages/"
\
The Environment Checker then no longer reports a failure
for the SSP validator.
# powervc-validate
--status
....
Group
Description: Shared Storage Pool Validations
NodeIp System Status Message
10.8.12.120 dev-pvc-cluster Pass
Successfully accessed the shared storage pool in cluster
dev-pvc-cluster.
10.8.12.120 dev-pvc-cluster Pass
The logical unit was created successfully in cluster dev-pvc-cluster.
10.8.12.120 dev-pvc-cluster Pass
logical unit was cloned in cluster dev-pvc-cluster.
10.8.12.120 dev-pvc-cluster Pass
The logical unit was successfully deleted in cluster dev-pvc-cluster.
The developers are working on delivering a permanent fix for this in a future update.
4.
Network not listed in “Create deploy template from….”.
We observed this behaviour with PowerVC 2.1.1.
After we had removed a HMC managed Host from PowerVC, and then managed the same Host again, but this time as a Novalink managed Host, we encountered an issue when trying to create a new deploy template.
When we tried to create a deploy template, we were not able to select an existing network, i.e., our existing Networks were not listed as available for selection, they were simply missing from the available network list! Only the “Imported” networks, from the Imported VMs were listed.

We do not know why this was happening, but we assume this could be another bug in 2.1.1, but we did not find a fix for the issue, so we can’t be sure. We worked around this by creating a new network, using the same VLAN and IP information as existing network.
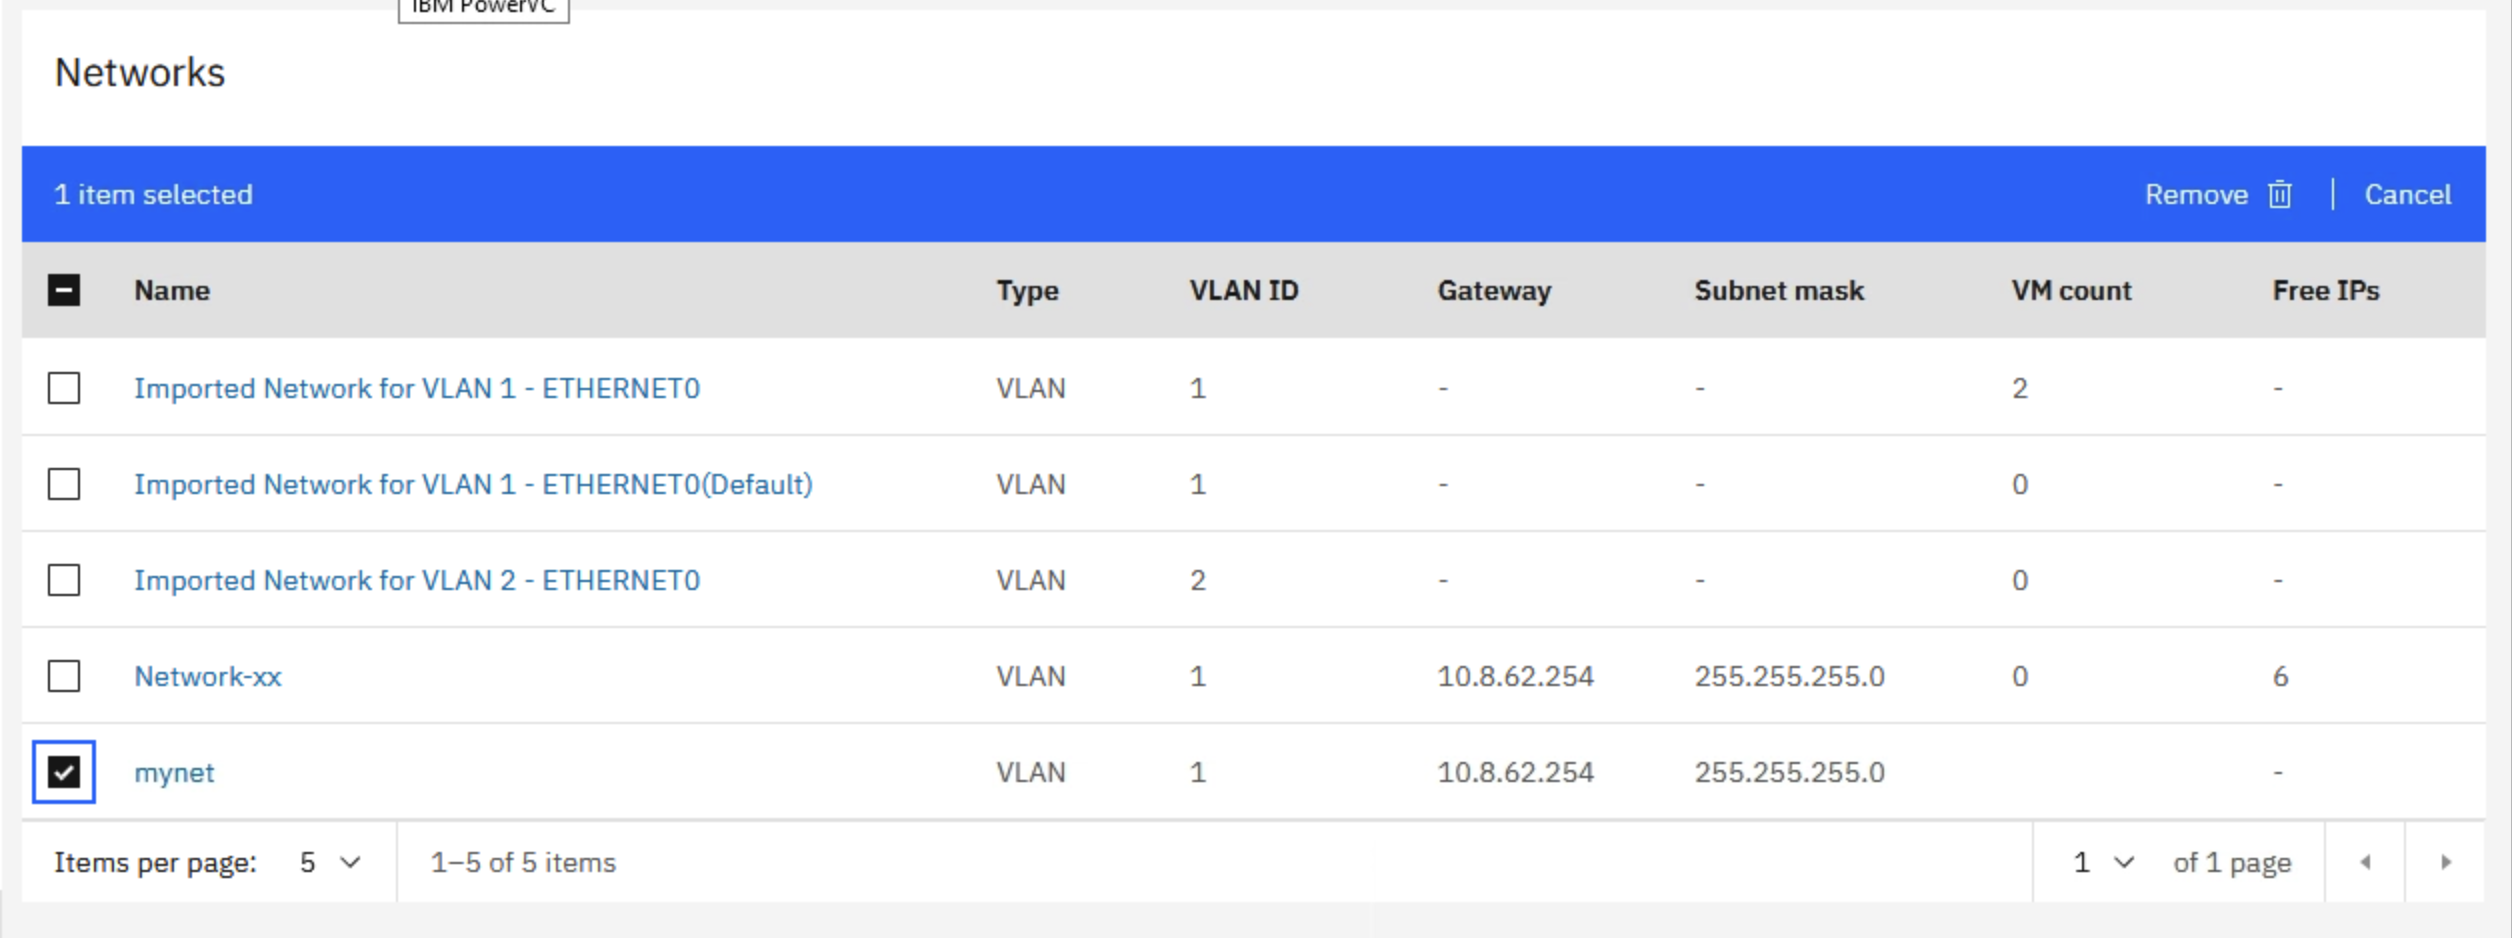
We were then able to select this “new” network in the deploy template and successfully deploy a new VM.
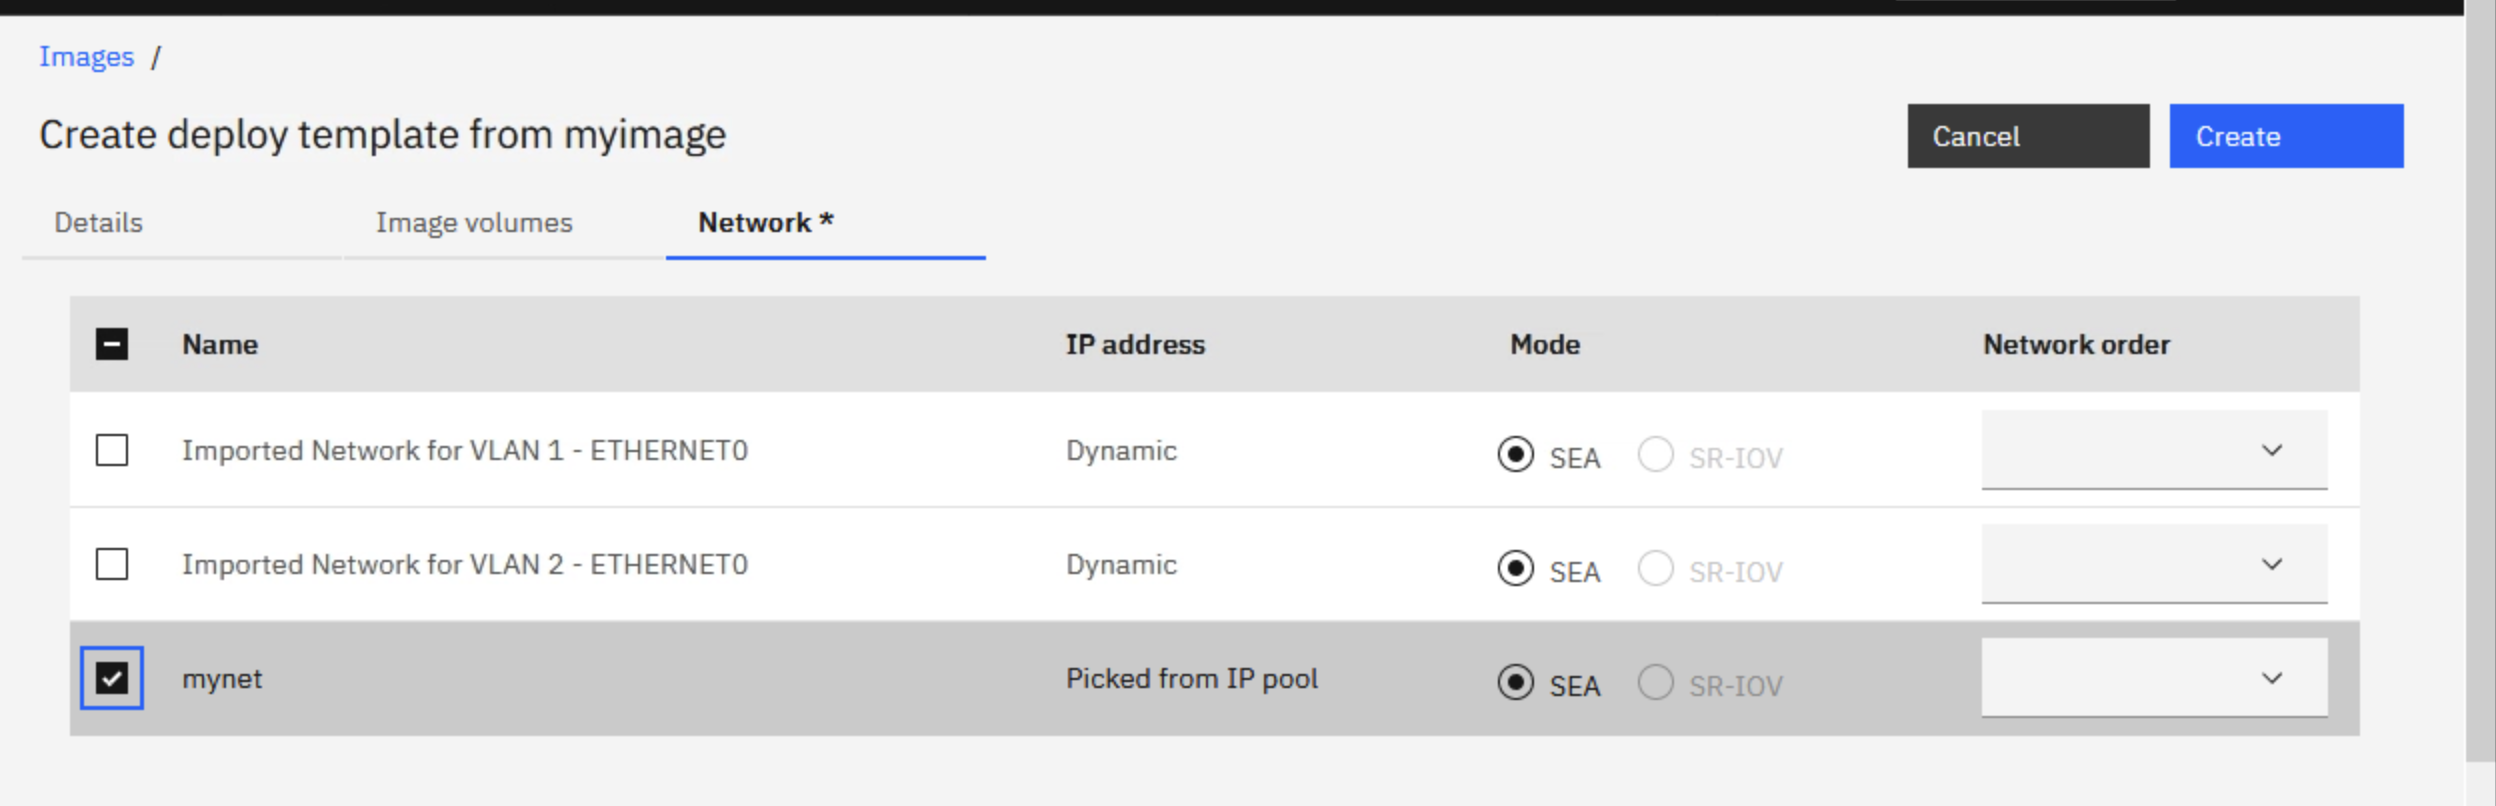
We were then able to deploy a VM, using the deploy template.

One other “deploy template” observation. At one point we saw there was a 'No SCG' error on the Deploy Template create screen in PowerVC. The SSP list and VIOS list looked fine but the SCG did not appear in the create deploy template page. So, we waited for the non-SAN-based SCGs to show up (we didn't time how long it took - maybe 10-15 minutes), and then created the deploy template without issue.
5.
SSP snapshot volumes are not deleted by PowerVC
We observed this behaviour with PowerVC 2.1.0 and 2.1.1. The issue has been reported to development and a fix is pending.
In our environment we are using a Shared Storage Pool (SSP) storage provider with PowerVC.

We captured a new image in PowerVC of one of our RHEL VMs. Before we captured the image with PowerVC, we logged into the VIOS and listed the current snapshots that were stored in the VIOS SSP. There was only one snapshot image at this point.
$ snapshot
-list
Lu(Client
Image)Name Size(mb) ProvisionType %Used Unused(mb) Lu Udid
volume-Image_sys8521-vm1-t1_Image_volume_1-9d1dd60d-1e1910240 THIN 0% 10240 4ec9338ed4f653b4bf61239d2f5b63bc
Snapshot
35cbcfea3643917277caf49a15ee0f71IMSnap
We captured the new image in PowerVC. The new image was named CG.

We listed the snapshots for the SSP again, and we found our new image was displayed, CG (volume-Image_CG_volume_1-7454fbe3-c64c10240). Good.
$ snapshot
-list
Lu(Client
Image)Name Size(mb) ProvisionType %Used Unused(mb) Lu Udid
volume-Image_CG_volume_1-7454fbe3-c64c10240 THIN 82% 1803 4ba7ec1f3d9808b0626907008e77c216
volume-Image_sys8521-vm1-t1_Image_volume_1-9d1dd60d-1e1910240 THIN 0% 10240 4ec9338ed4f653b4bf61239d2f5b63bc
Snapshot
35cbcfea3643917277caf49a15ee0f71IMSnap
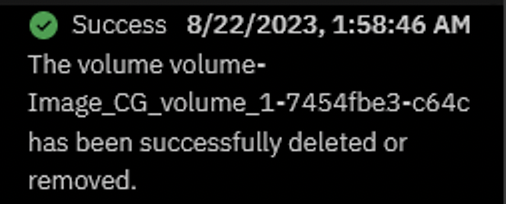
Later we deleted the image from PowerVC.
PowerVC notified us that the image had been successfully deleted.
The PowerVC UI no longer listed the CG image.

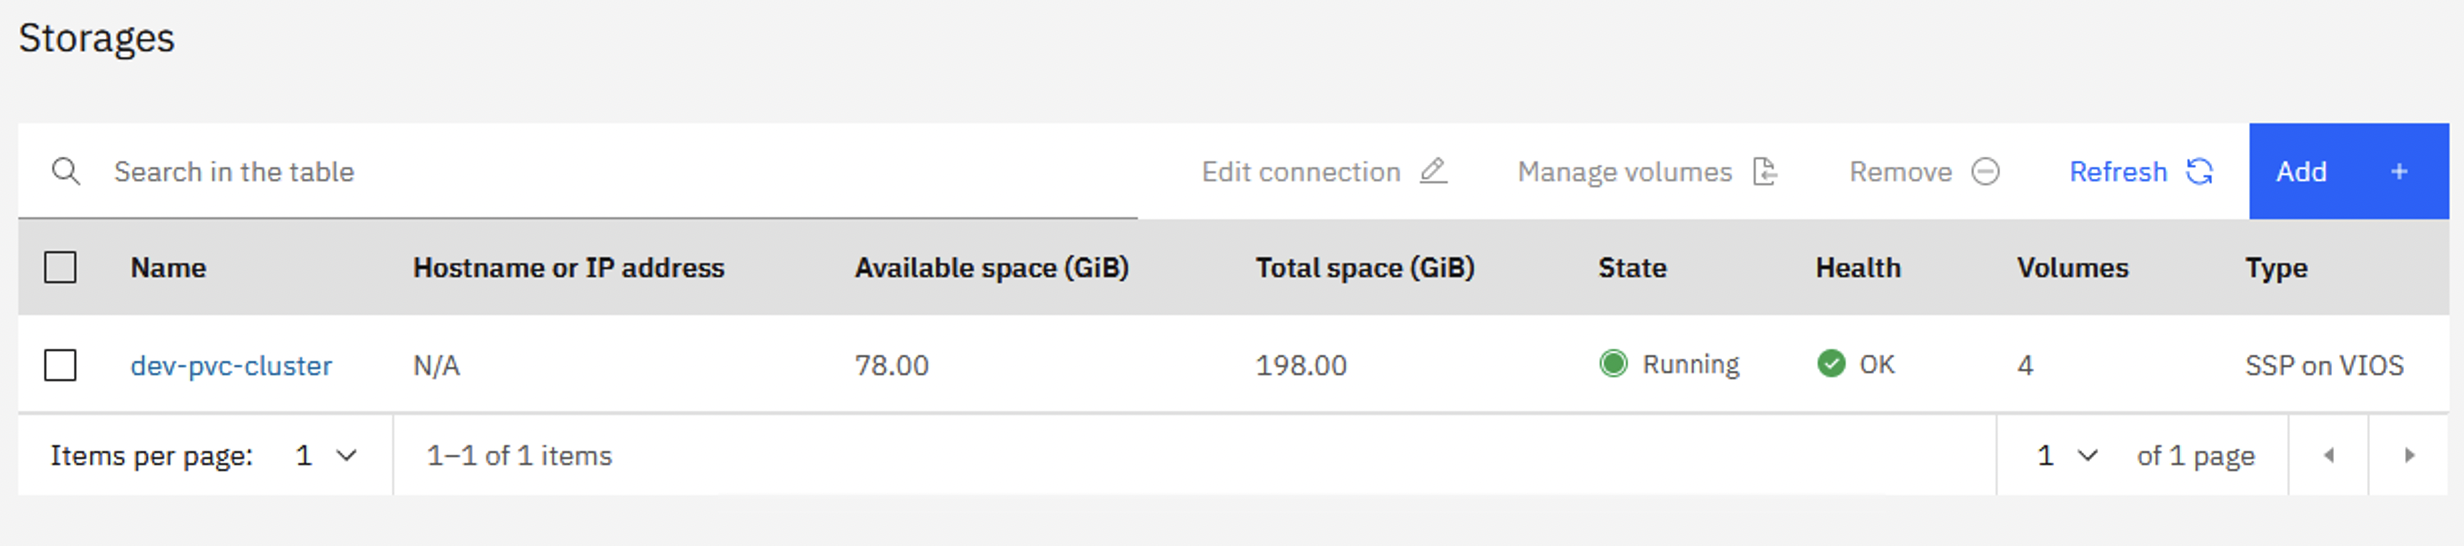
But we noticed that the Available space (GiB) for the SSP has not changed and is still showing 78GB instead of the original 86GB. Curious!
Again, we listed the snapshots in the VIOS SSP and we found that the CG image was still there and had NOT been deleted by PowerVC! Not good.
$ snapshot
-list
Lu(Client
Image)Name Size(mb) ProvisionType %Used Unused(mb) Lu Udid
volume-Image_CG_volume_1-7454fbe3-c64c10240 THIN
82% 1803
4ba7ec1f3d9808b0626907008e77c216
volume-Image_sys8521-vm1-t1_Image_volume_1-9d1dd60d-1e1910240 THIN 0% 10240 4ec9338ed4f653b4bf61239d2f5b63bc
Snapshot
35cbcfea3643917277caf49a15ee0f71IMSnap
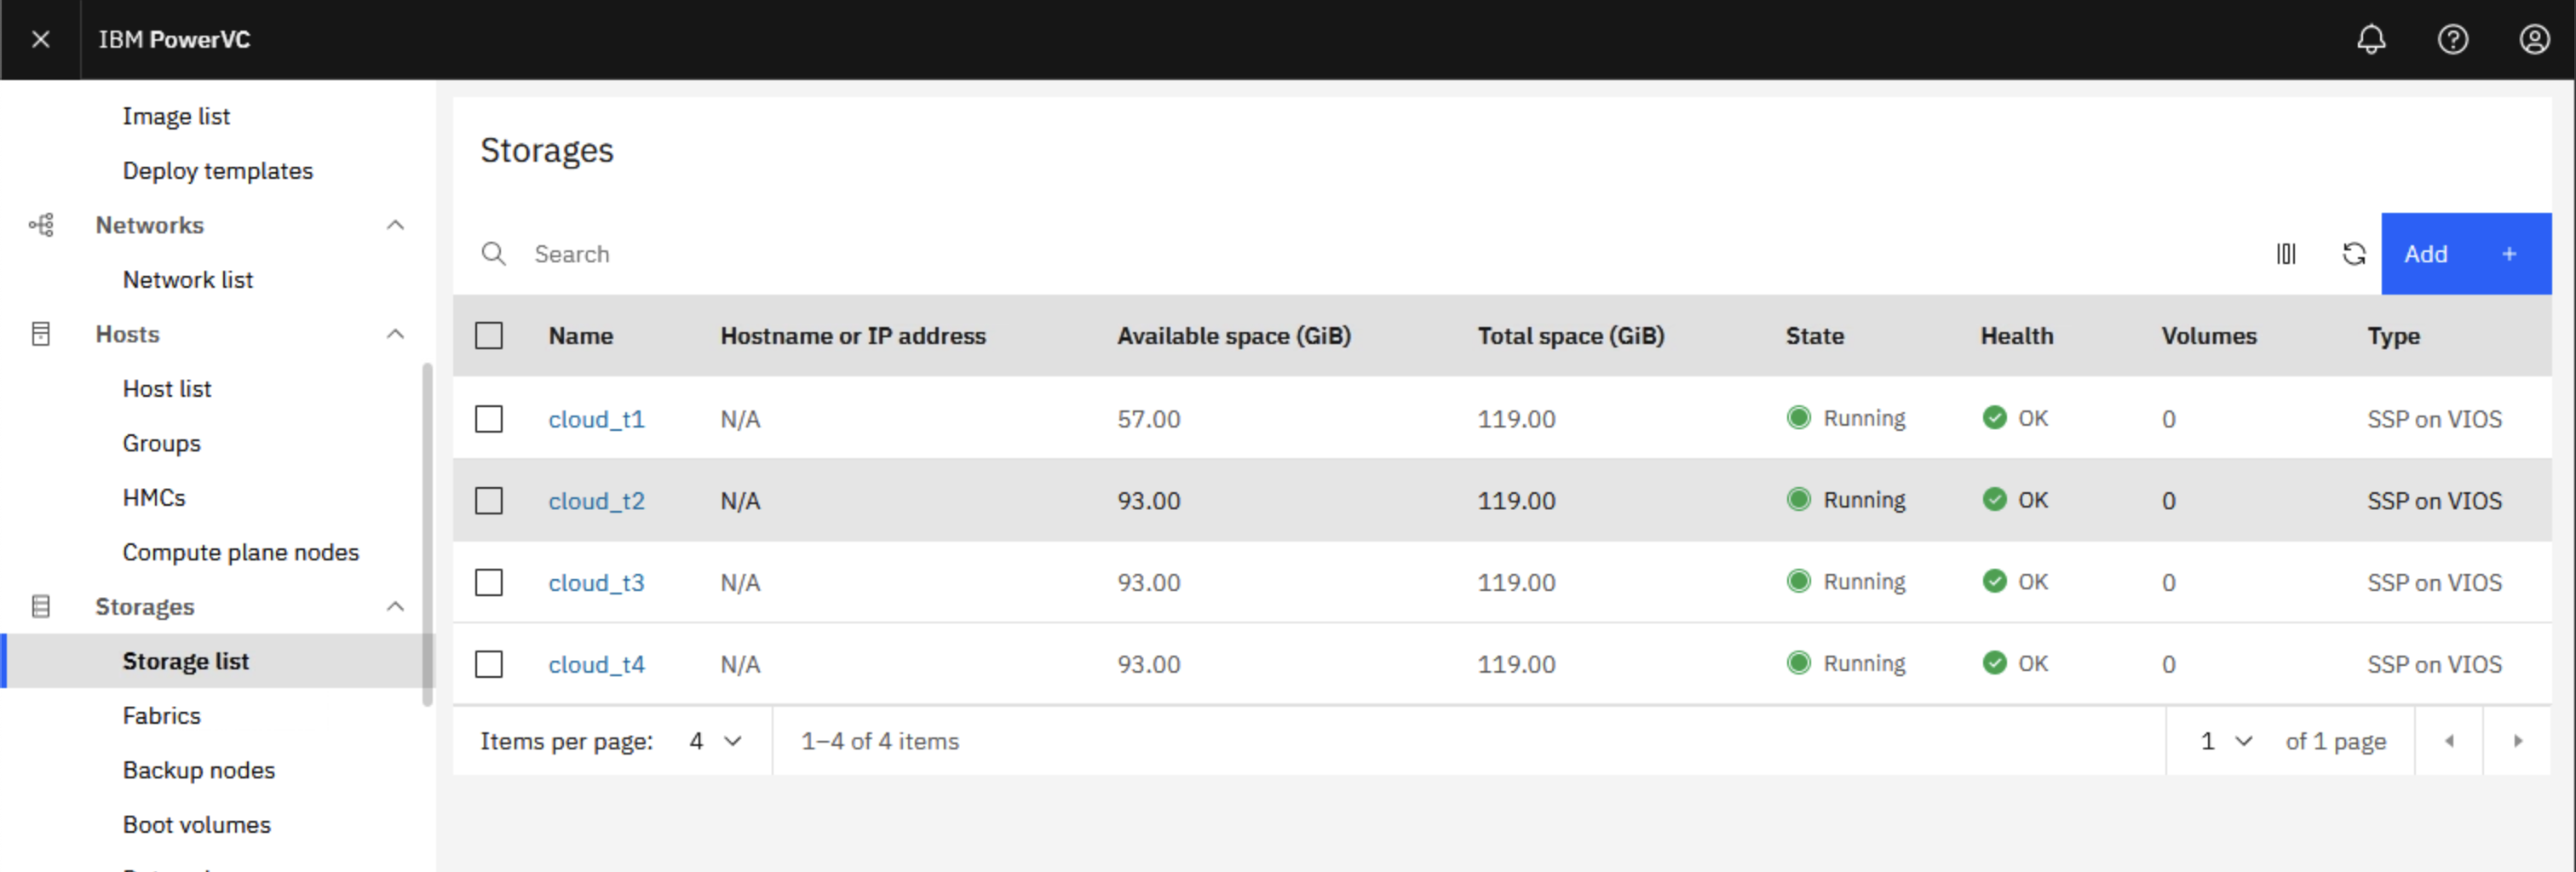
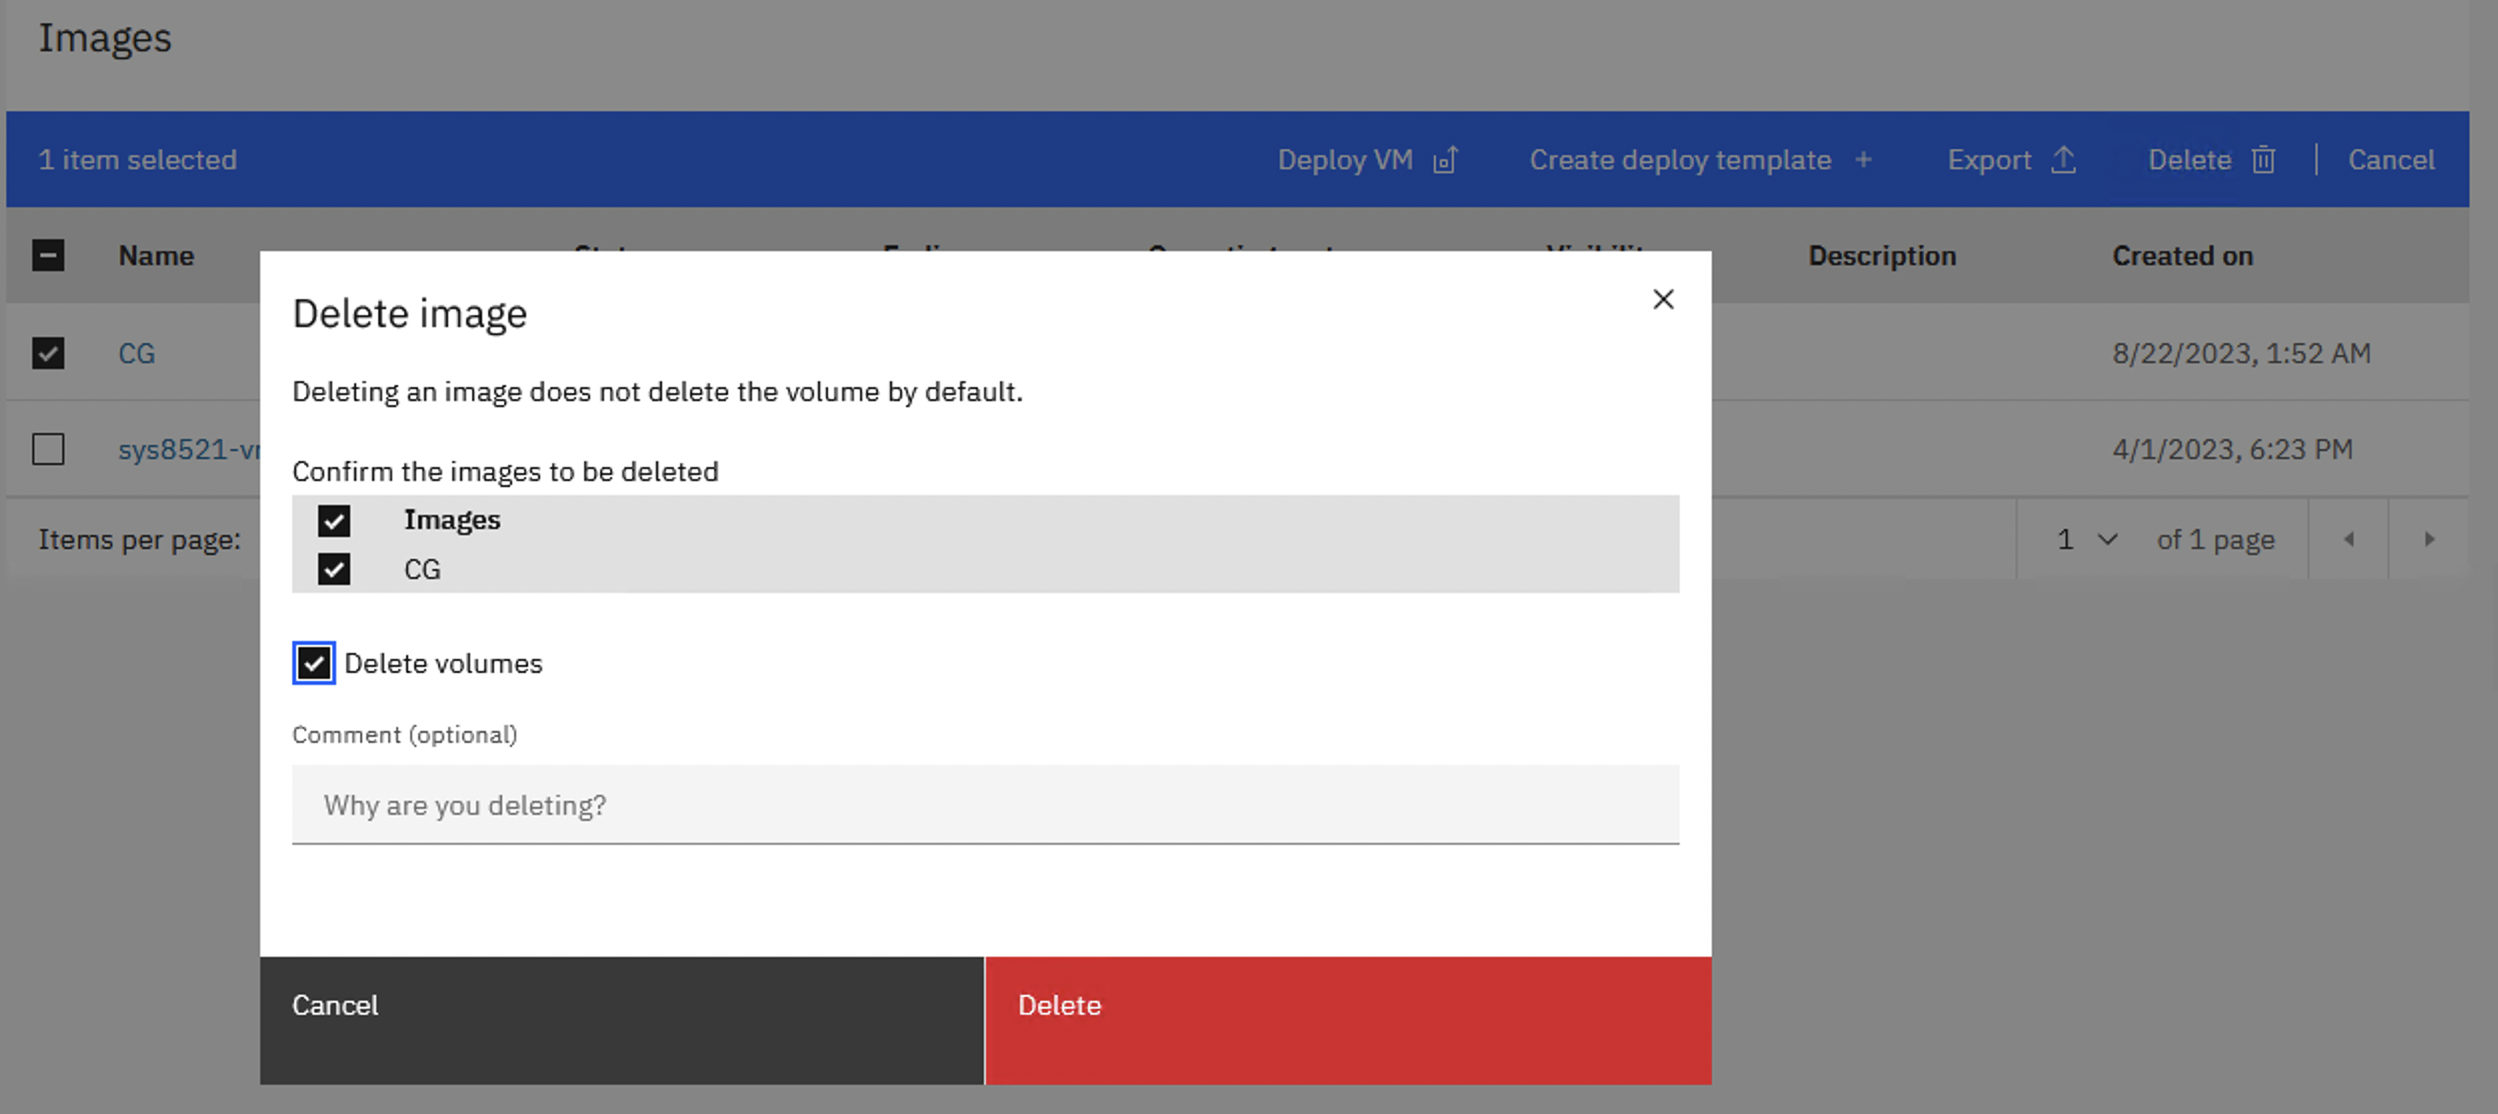
So, one way to successfully delete the image (the snapshot) from the VIOS SSP is to manage the volume and use the PowerVC UI to delete it. Here are the steps.
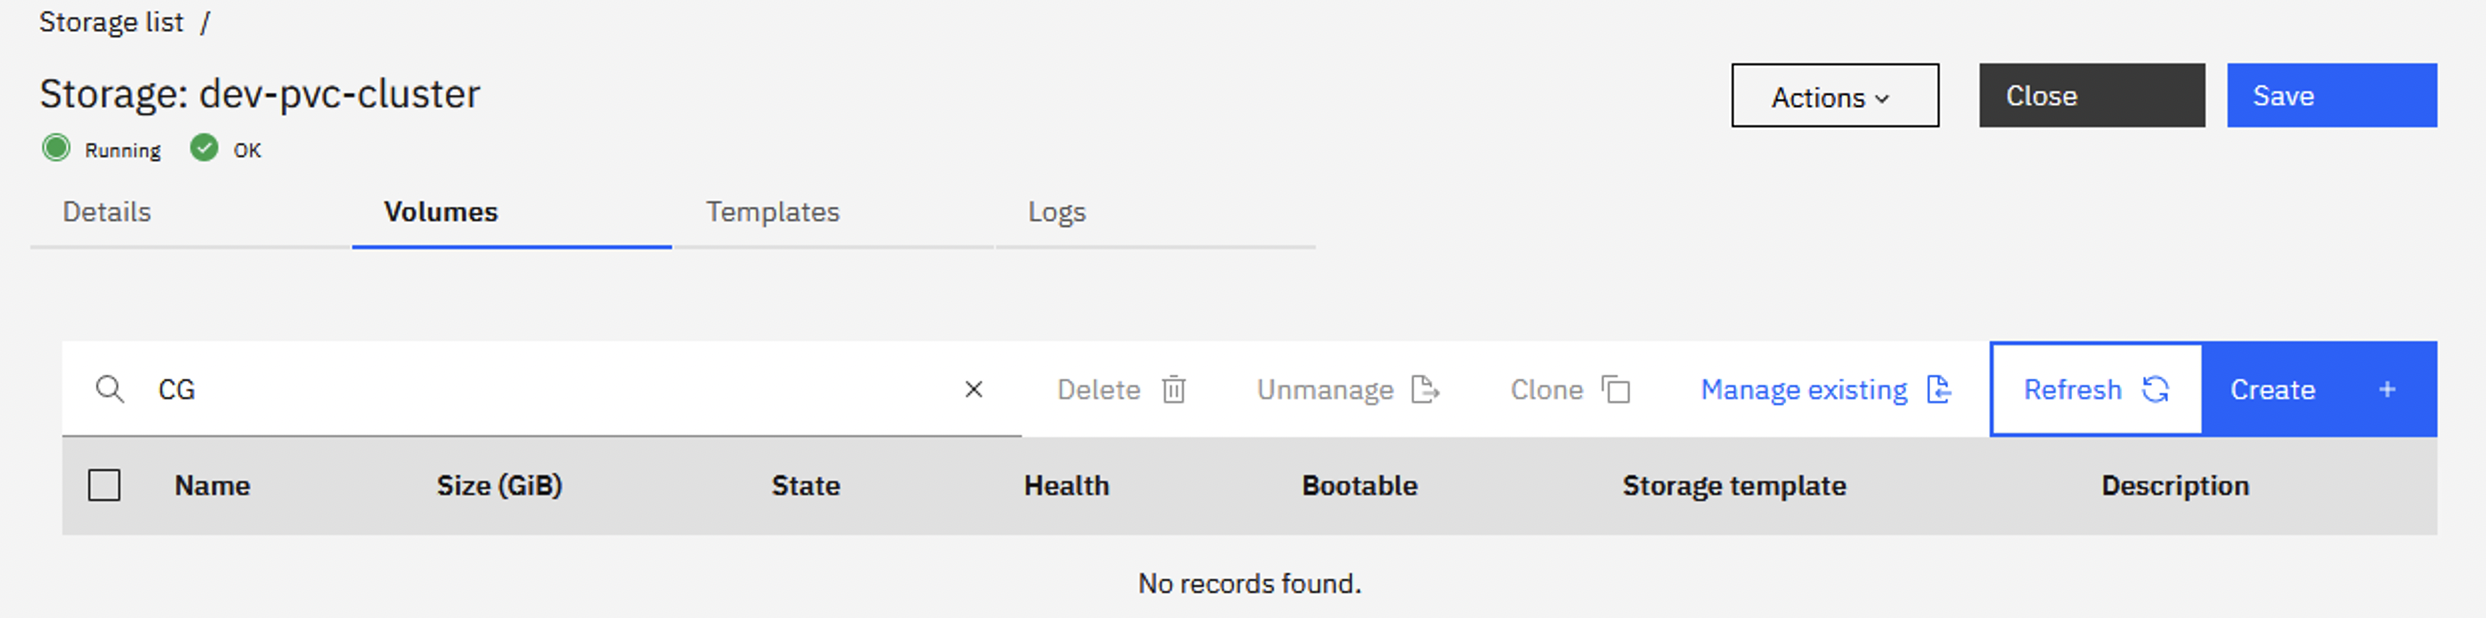
From the Storage list view, click on the SSP name, then click on Volumes and click on Manage existing.
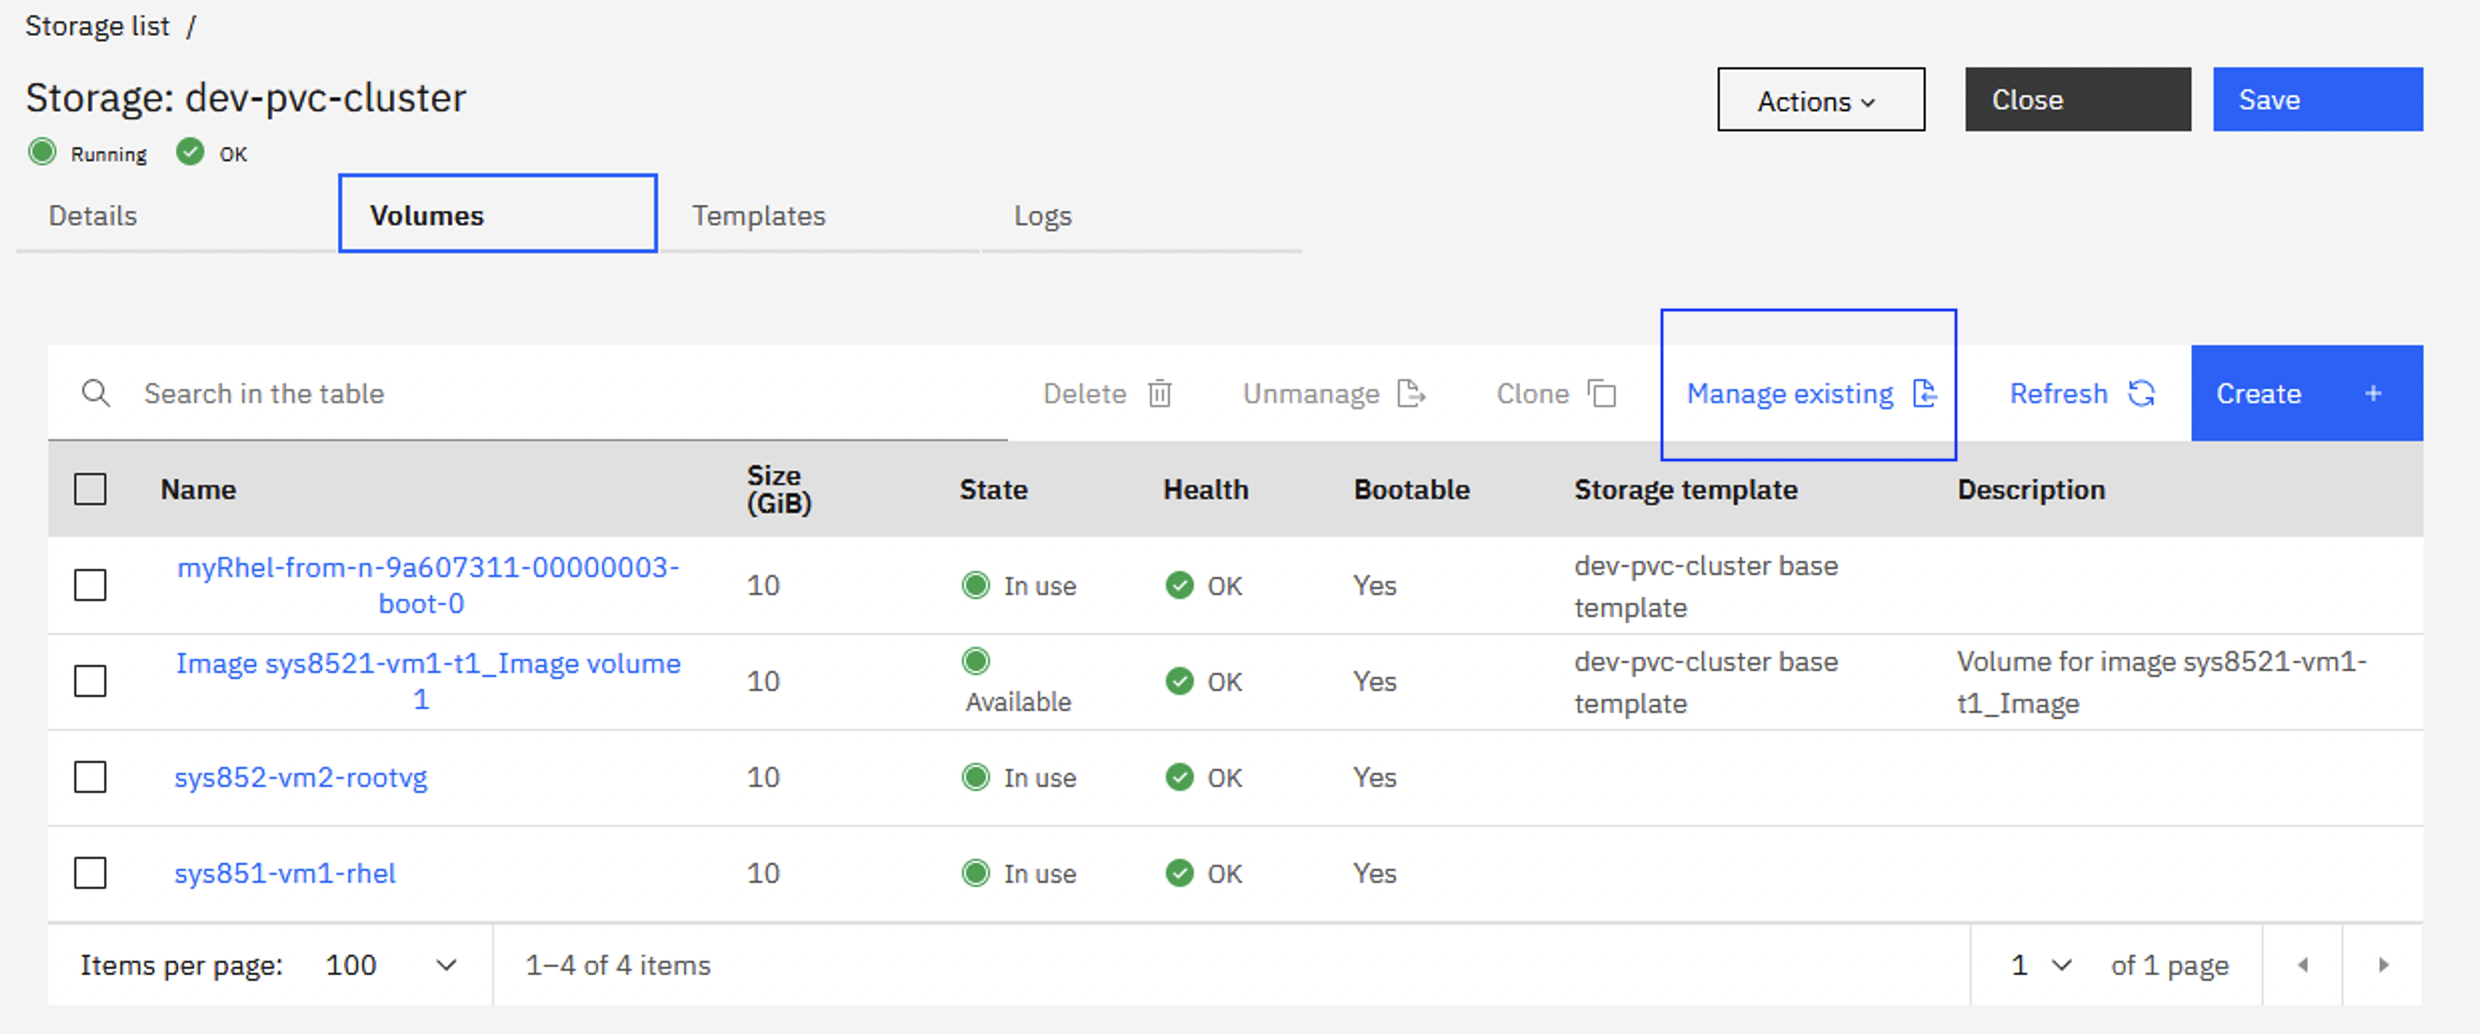
From the list of Select specific volumes, select the image/volume/snapshot you need to delete from the SSP. In this case we’ve filtered the list to only show our image name, CG.
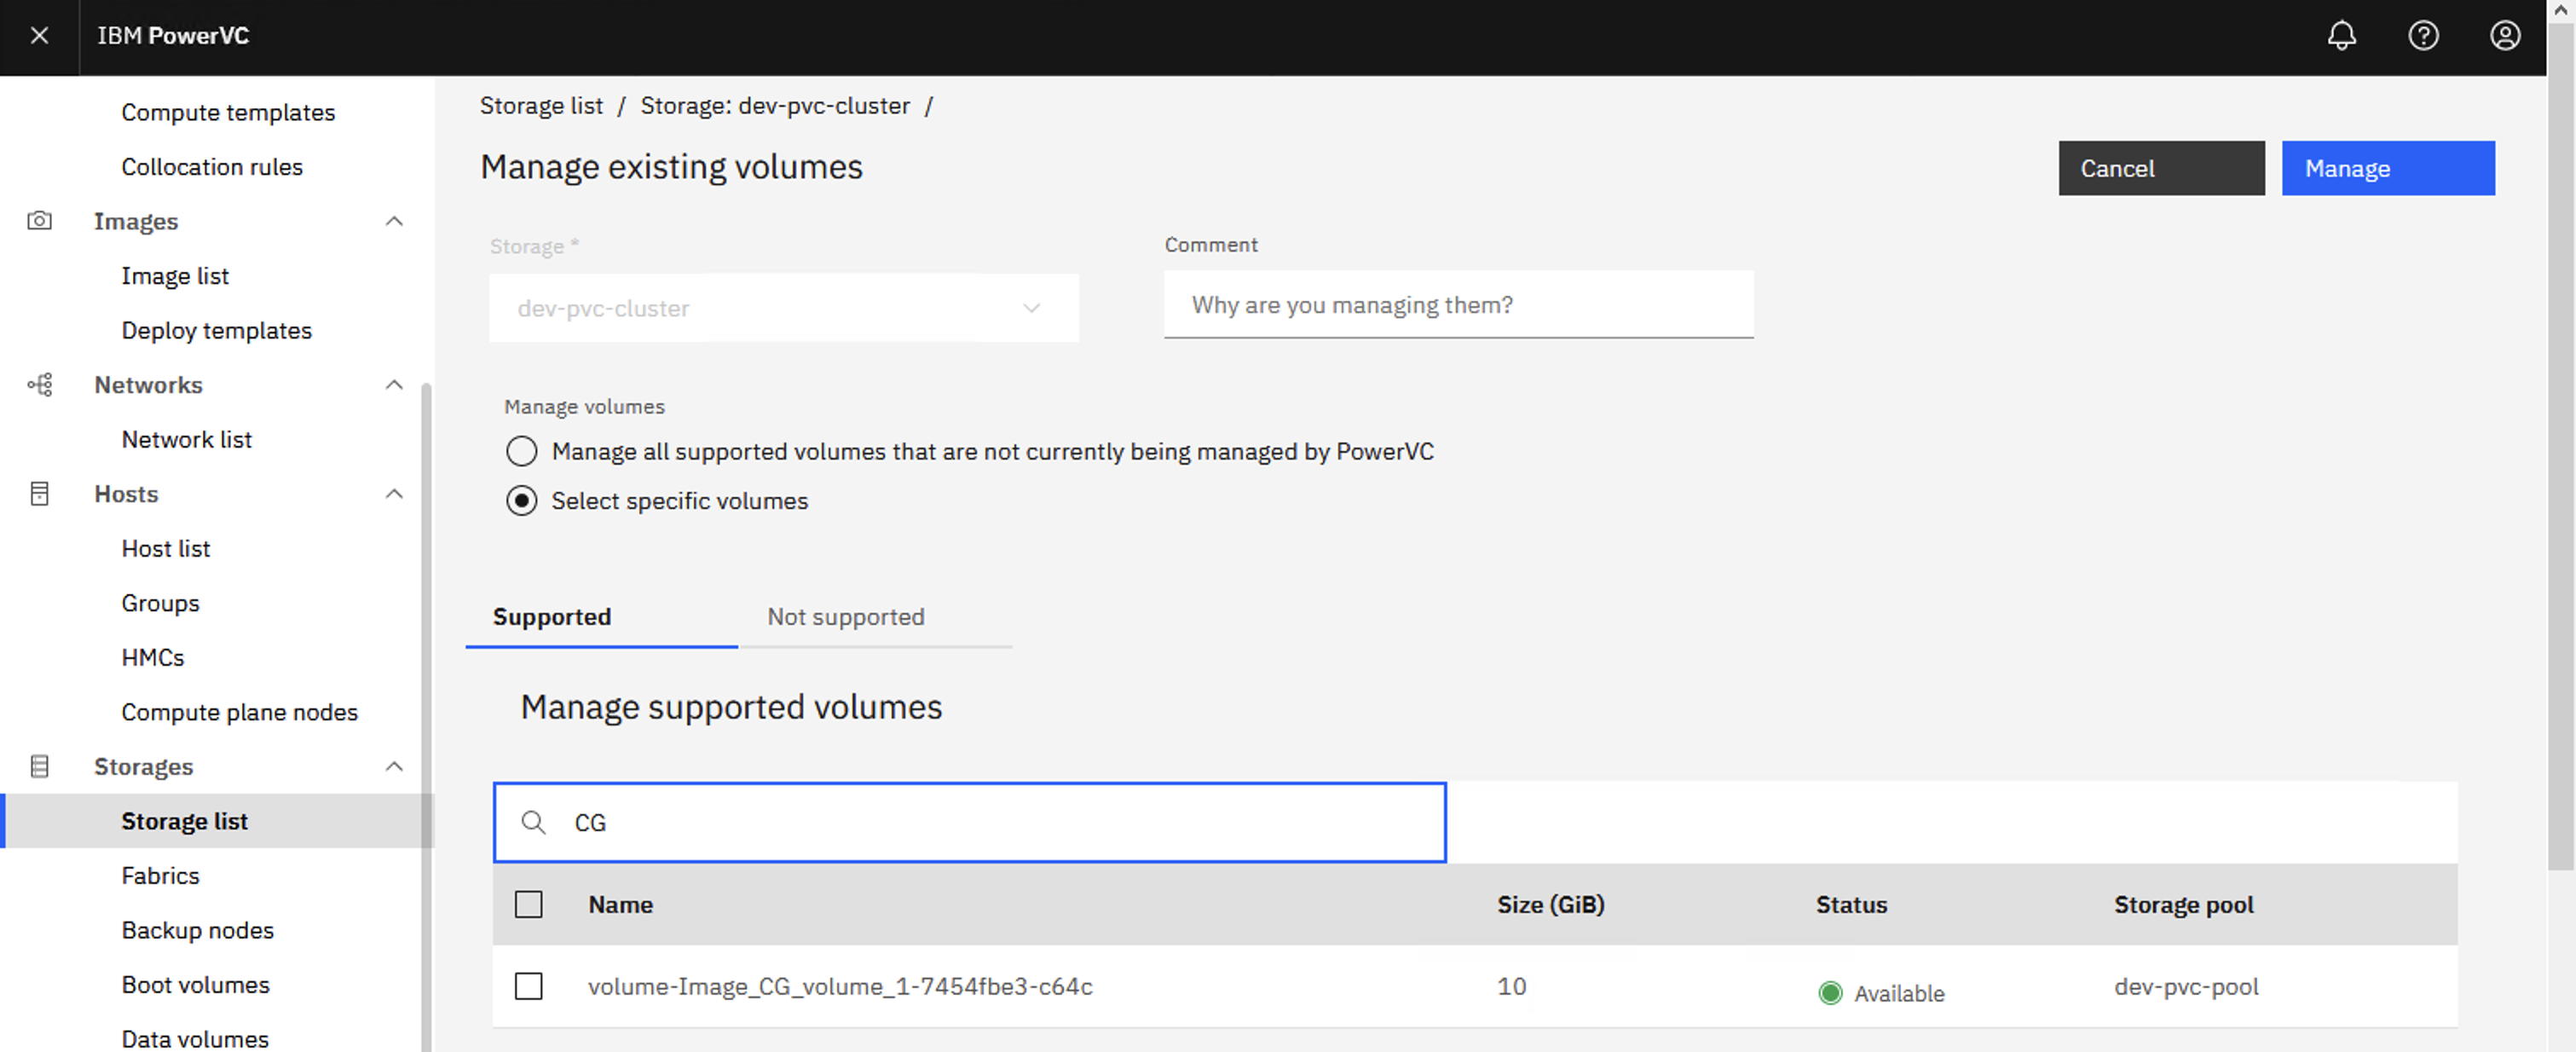
Tick the image and click on Manage.

PowerVC notifies us when the volume is now managed.
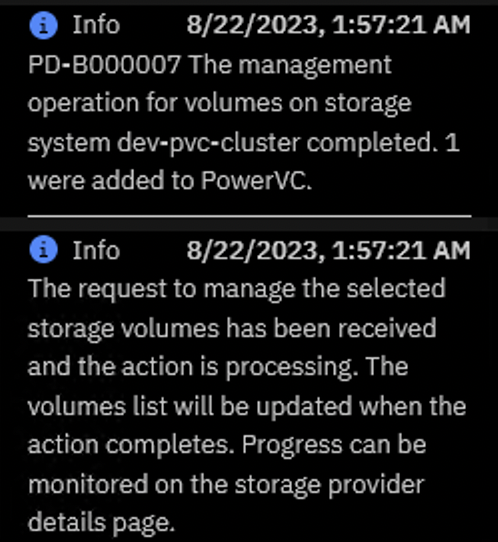
We waited a few minutes until the volume Health changed from Pending to OK.

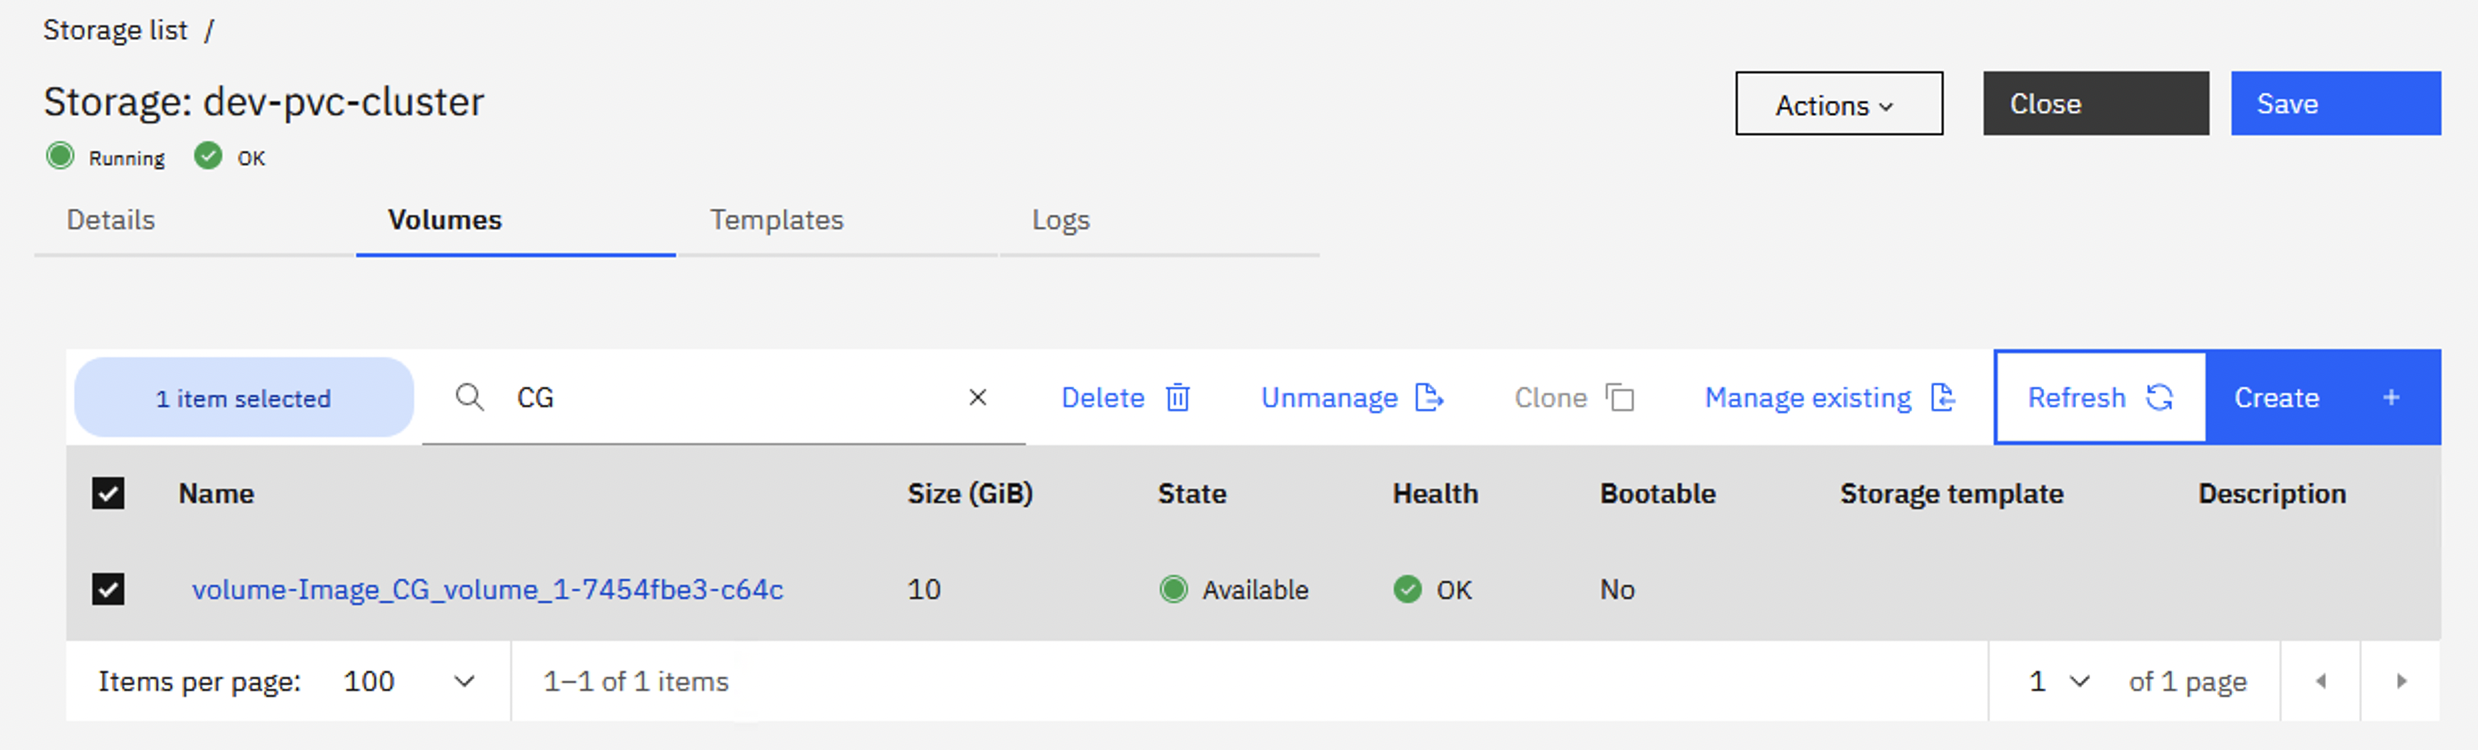
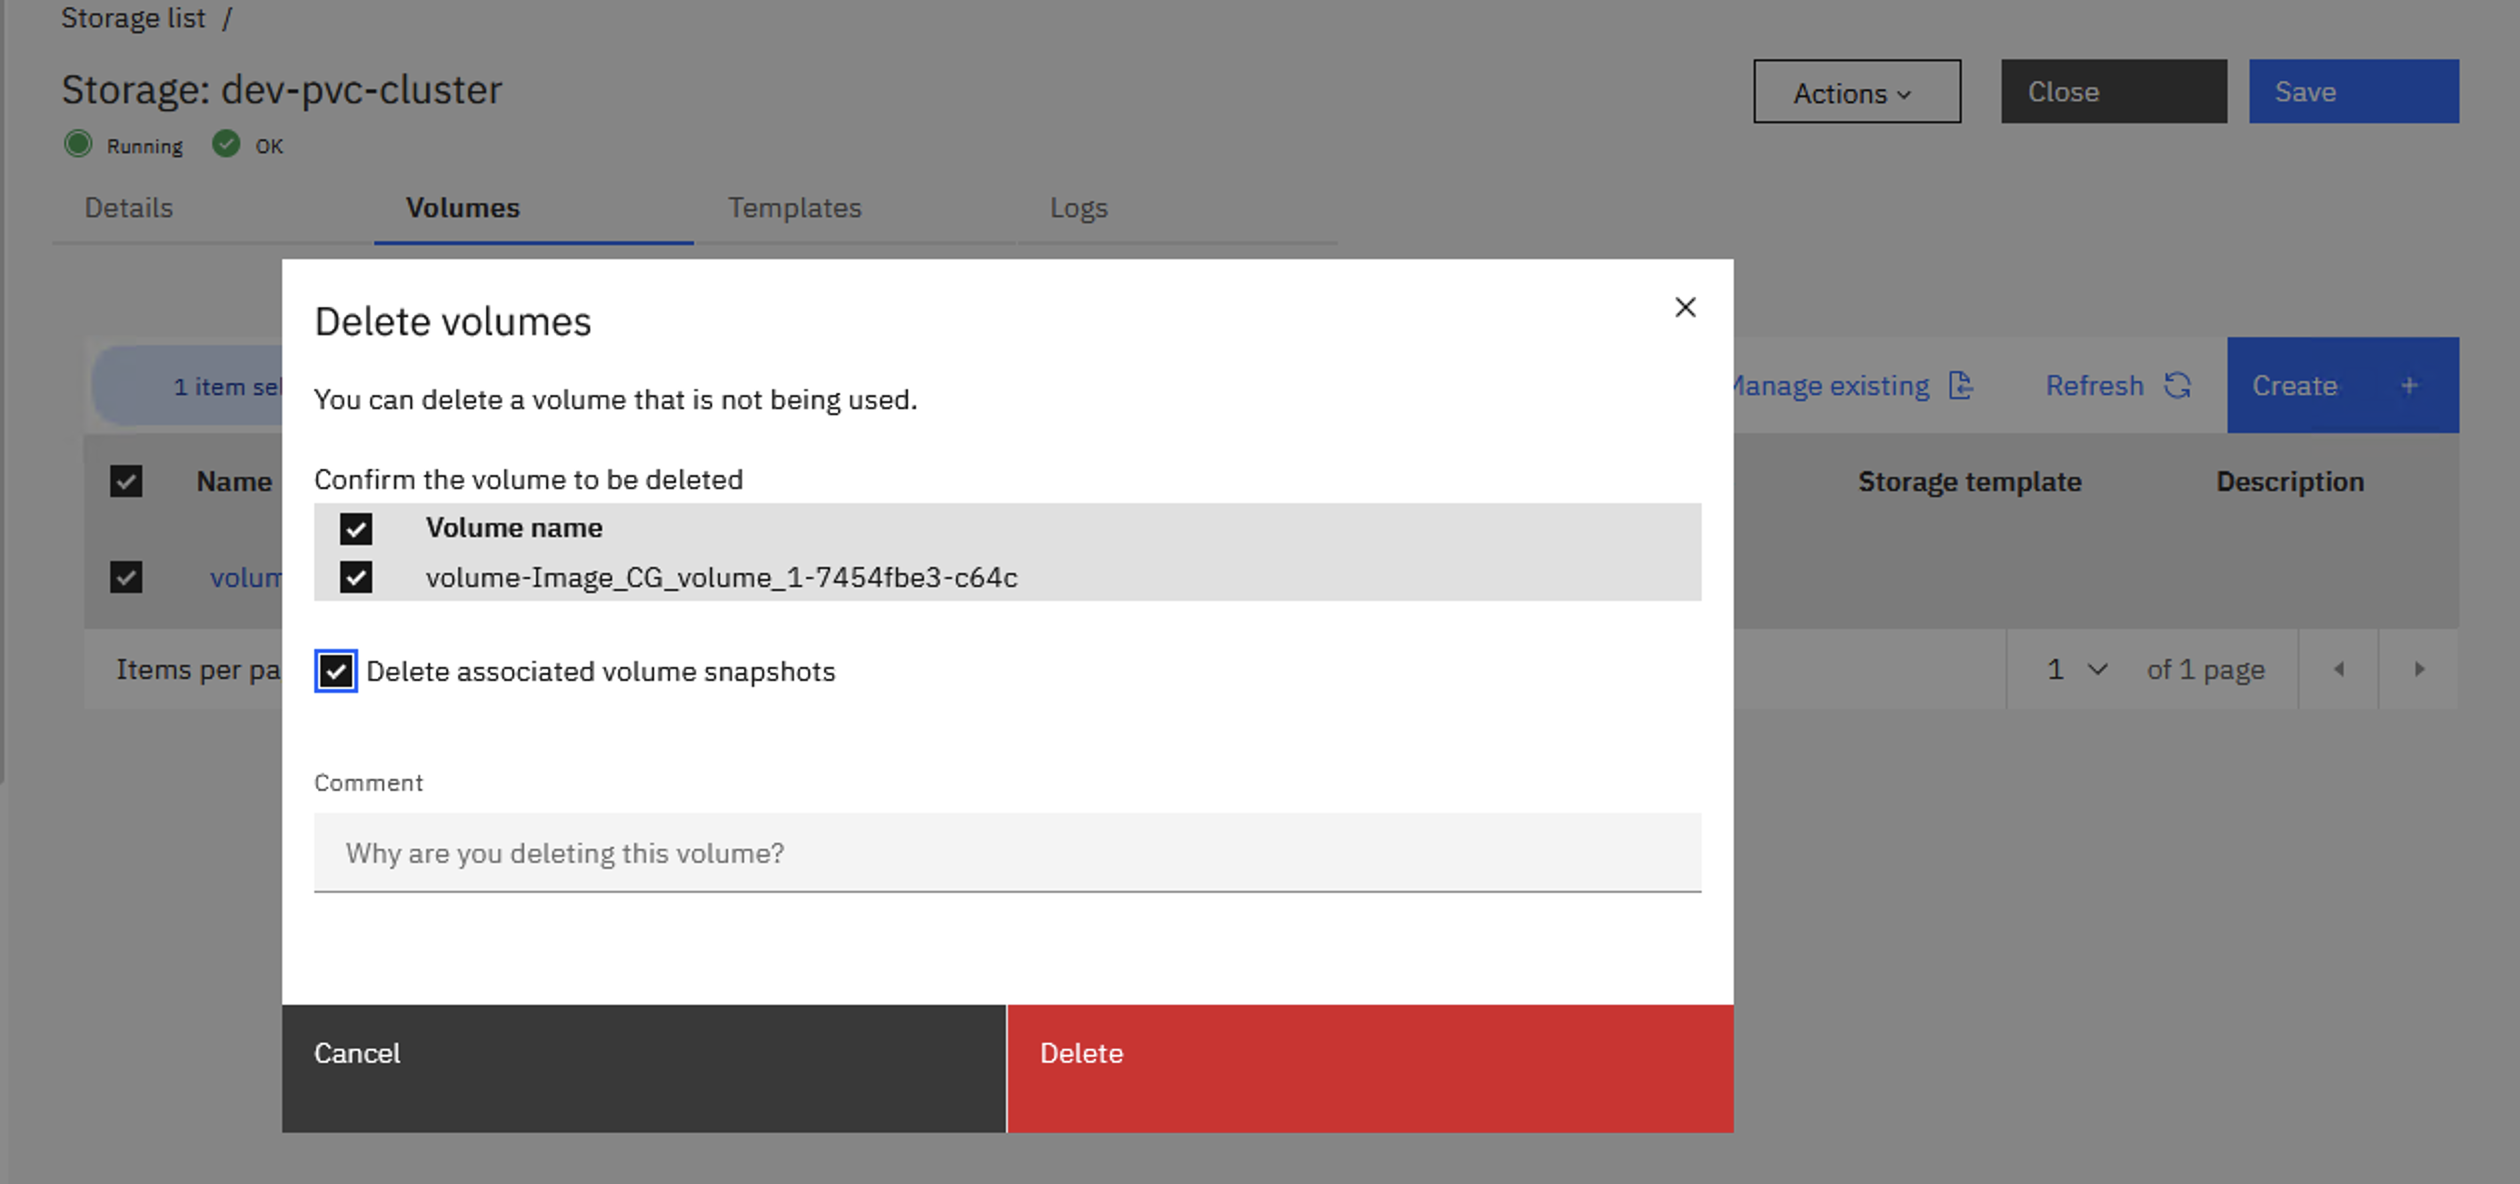
Next we deleted the volume from the SSP using the PowerVC UI. Ticking the image, clicking Delete, ticking Delete associated volume snapshots and clicking Delete.
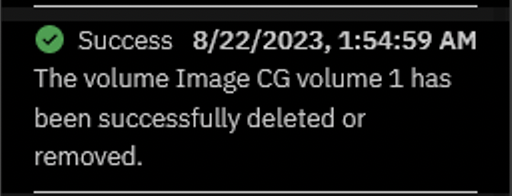
PowerVC notifies us when the volume has been deleted.
Our volume, named CG, is no longer listed in the PowerVC UI.
And, finally, from the VIOS we list the snapshots again and find that the CG volume has been removed as expected.
$ snapshot
-list
Lu(Client
Image)Name Size(mb) ProvisionType %Used Unused(mb) Lu Udid
volume-Image_sys8521-vm1-t1_Image_volume_1-9d1dd60d-1e1910240 THIN 0% 10240 4ec9338ed4f653b4bf61239d2f5b63bc
Snapshot
35cbcfea3643917277caf49a15ee0f71IMSnap
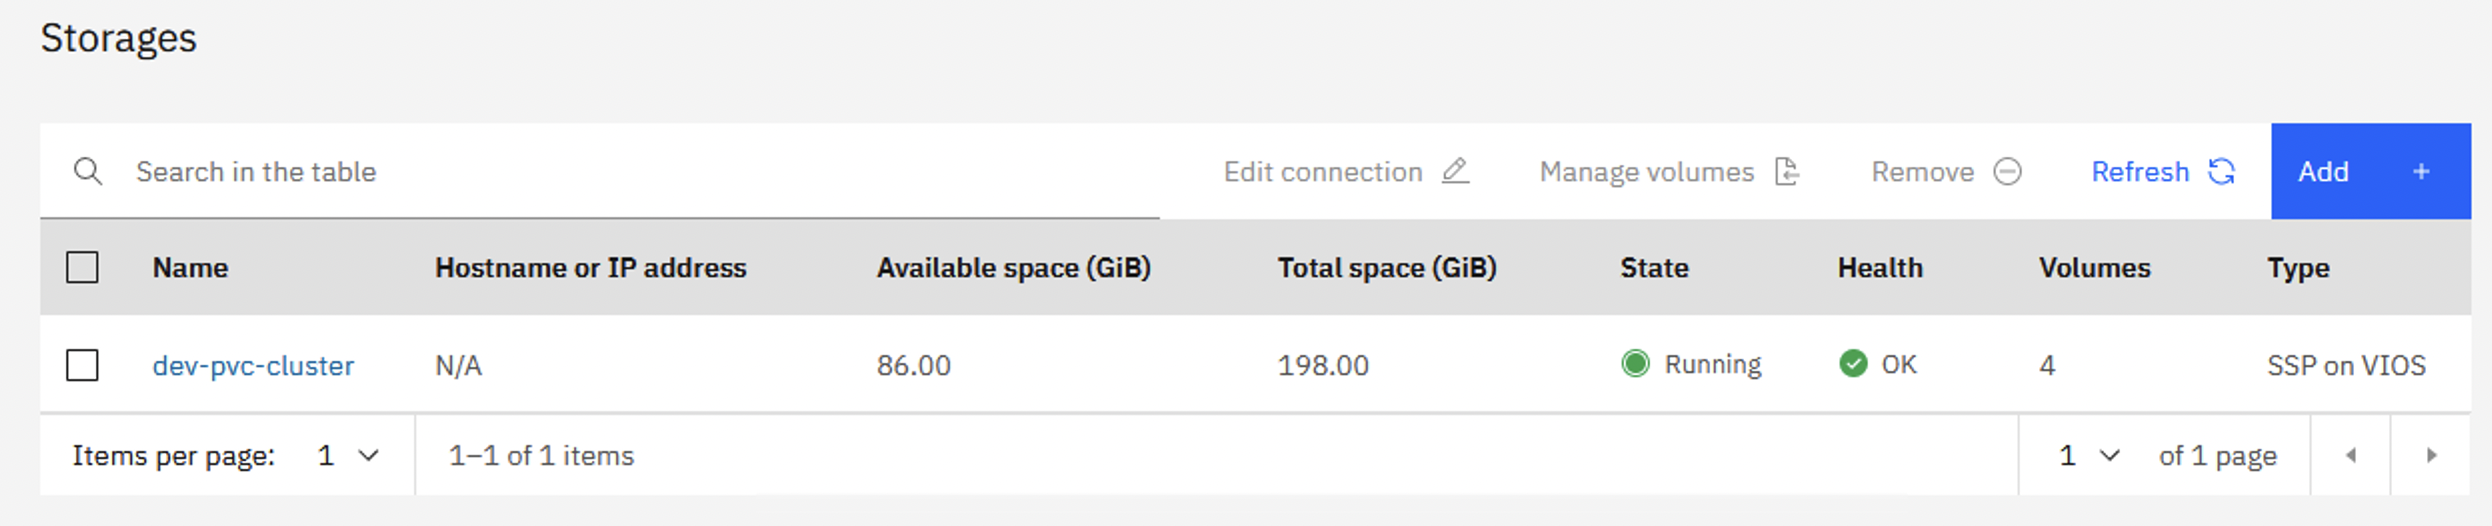
And the Available space (GiB) for the SSP storage provider has increased to its original size.
6. Novalink network setup issues.
This last observation relates to Novalink 2.1.0 (and not
PowerVC).
We followed these instructions to install and configure Novalink
on an LPAR running RHEL 8.6.
Installing the PowerVM NovaLink 2.1.1 software on a Red Hat Linux
8.6 partition
We the /usr/bin/conf_private_network script to
configure the MGMTSWITCH and private IPv4 network, 192.168.128.1 (on the
novalink host) and 192.168.128.2 (on the VIOS).
# /usr/bin/conf_private_network
Configuring
private network with following details.
Management Vswitch name : MGMTSWITCH
Novalink private IP : 192.168.128.1
VIOS private IP : 192.168.128.2
Configure
private network? (Y/N) : Y
Creating
Management switch MGMTSWITCH
Management
switch created successfully.
Fetching
VIOS list
Starting
private network configuration for VIOS ID
1 .
Validating
exisiting private network on VIOS, please wait...
Creating
virtual ethernet adapter on VIOS ID 1
Ethernet
adapter created successfully on VIOS ID
1 .
Configuring
device, please wait...
VIOS
interface found for setting Private IP is : en6.
Adding
network on VIOS with IP 192.168.128.2 on interface en6
192.168.128.2
added successfully on VIOS ID 1 on interface en6.
Starting
private network configuration for Novalink.
Validating
exisiting private network on Novalink.
Ethernet
adapter created successfully on Novalink ID 2.
Ethernet
ID found on Novalink with adapter ID ibmveth4
Ethernet
adapter MAC Address 9ab55fad670c.
Private
network added on Novalink on adapter ID ibmveth4
Reboot
the Novalink to apply changes : sudo reboot
Check
/var/log/pvm/novalink_conf_20230328_21_11_31.log for more details.
The LPAR (the novalink host) was configured with two network
interfaces, but it looks like the /usr/bin/conf_private_network script
removed the ipv4 configuration from the first interface(?). And then it failed
to configure any IP address, on any interface!! Both interfaces were configured
with ipv6 addresses (the default, unconfigured state). Again, we suspect this
is a bug with the /usr/bin/conf_private_network script, but, regardless,
we needed to implement some additional manual steps to work around this issue.
We reconfigured the novalink host to have a network configuration similar
to what you see below:
[root@sys8771-novalink
~]# ifconfig -a
ibmveth3: flags=4163<UP,BROADCAST,RUNNING,MULTICAST> mtu 1500
inet 10.8.62.11 netmask 255.255.255.0 broadcast 10.8.62.255
inet6 fe80::ec95:90ff:fe62:2503 prefixlen 64
scopeid 0x20<link>
ether ee:95:90:62:25:03 txqueuelen 1000 (Ethernet)
RX packets 13537 bytes 2787429 (2.6 MiB)
RX errors 0 dropped 0
overruns 0 frame 0
TX packets 15176 bytes 2410954 (2.2 MiB)
TX errors 0 dropped 0 overruns 0 carrier 0
collisions 0
device interrupt 20
ibmveth4: flags=4163<UP,BROADCAST,RUNNING,MULTICAST> mtu 1500
inet 192.168.128.1 netmask
255.255.128.0 broadcast 192.168.255.255
inet6 fe80::1816:60ff:fe73:e044 prefixlen 64
scopeid 0x20<link>
ether 1a:16:60:73:e0:44 txqueuelen 1000 (Ethernet)
RX packets 0 bytes 0 (0.0 B)
RX errors 0 dropped 0
overruns 0 frame 0
TX packets 19 bytes 1342 (1.3 KiB)
TX errors 0 dropped 0 overruns 0 carrier 0
collisions 0
device interrupt 21
…
This allowed novalink to report the RMC status for the VIOS and
VMs.
# pvmctl
vios list -d name id rmc_state rmc_ip
name=sys8771-vios-t1,id=1,rmc_state=active,rmc_ip=10.8.62.100
name=sys8771-vios-t2,id=4,rmc_state=active,rmc_ip=10.8.62.120
name=sys8771-vios-t3,id=7,rmc_state=active,rmc_ip=10.8.62.140
name=sys8771-vios-t4,id=10,rmc_state=active,rmc_ip=10.8.62.160
# pvmctl
vm list -d name id rmc_state rmc_ip
name=sys8771-vm1-t1,id=2,rmc_state=active,rmc_ip=fe80::ec95:95ff:fe64:503
name=sys8771-vm2-t1,id=3,rmc_state=active,rmc_ip=10.8.62.103
name=sys8771-vm1-t2,id=5,rmc_state=active,rmc_ip=fe80::ec95:9bff:fe16:8304
name=sys8771-vm2-t2,id=6,rmc_state=active,rmc_ip=10.8.62.123
name=sys8771-vm1-t3,id=8,rmc_state=active,rmc_ip=fe80::ec95:94ff:feb9:ff05
name=sys8771-vm2-t3,id=9,rmc_state=active,rmc_ip=10.8.62.143
name=sys8771-vm1-t4,id=11,rmc_state=active,rmc_ip=fe80::ec95:90ff:fe47:8c06
name=sys8771-vm2-t4,id=12,rmc_state=active,rmc_ip=10.8.62.163
name=sys8771-novalink,id=13,rmc_state=inactive,rmc_ip=
According to the Novalink dev team, the mix of ipv4 and ipv6
addresses is expected and fine. It certainly doesn’t appear to cause any issues
based on our testing. Again, according to the dev team, the novalink host will
not display an IP or RMC state as it's the master, i.e., this is expected, …,rmc_state=inactive,rmc_ip=.
Below is the network configuration we manually created for the
novalink host.
# pwd
/etc/sysconfig/network-scripts
# ls
-ltr
total
12
-rw-r--r--
1 root root 320 Aug 1 13:31 ifcfg-eth0 << Existing
-rw-r--r--
1 root root 99 Aug 7 19:36 ifcfg-ibmveth4 << Existing
-rw-r--r--
1 root root 263 Aug 7 20:18
ifcfg-ibmveth3 << New
# cat
ifcfg-ibmveth4
BOOTPROTO=none
DEVICE=ibmveth4
IPADDR=192.168.128.1
NETMASK=255.255.128.0
ONBOOT=yes
TYPE=Ethernet
# cp
ifcfg-eth0 ifcfg-ibmveth3
# cat
ifcfg-ibmveth3
#
Generated by parse-kickstart
TYPE=Ethernet
DEVICE=ibmveth3
ONBOOT=yes
IPADDR=10.8.62.11
NETMASK=255.255.255.0
GATEWAY=10.8.62.254
IPV6INIT=no
PROXY_METHOD=none
BROWSER_ONLY=no
PREFIX=24
DEFROUTE=yes
IPV4_FAILURE_FATAL=no
IPV6_DEFROUTE=yes
IPV6_FAILURE_FATAL=no
The ifcfg-ibmveth3 config
file is almost identical to the ifcfg-eth0 config
file, except the DEVICE attribute
is set to ibmveth3 (and not
eth0) and the UUID and NAME entries has been removed. We are not sure how
or where the ifcfg-eth0 file was
created, but it looks like the script broke any existing configuration on the
host! Again, we think this is a bug.
# diff
ifcfg-eth0 ifcfg-ibmveth3
3,4c3
<
DEVICE=eth0
<
UUID=20539052-8afe-4ac6-bd82-f0e1451d05a1
---
>
DEVICE=ibmveth3
17d15
<
NAME="System eth0"
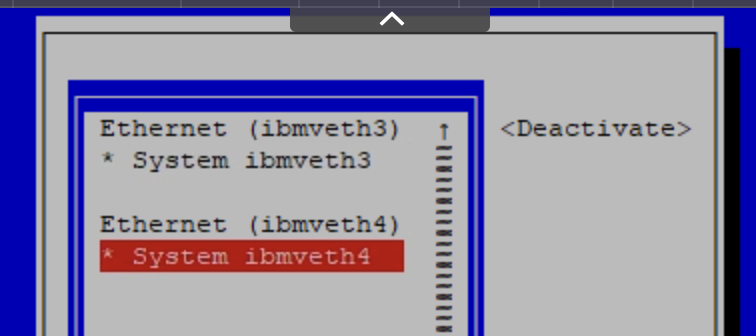
Once the network config scripts were created and updated, we
ran the nmtui tool to
activate the new network interface configurations. We selected each interface
and pressed Enter to Activate them, i.e., * System
ibmveth3 and * System ibmveth4.
# nmtui
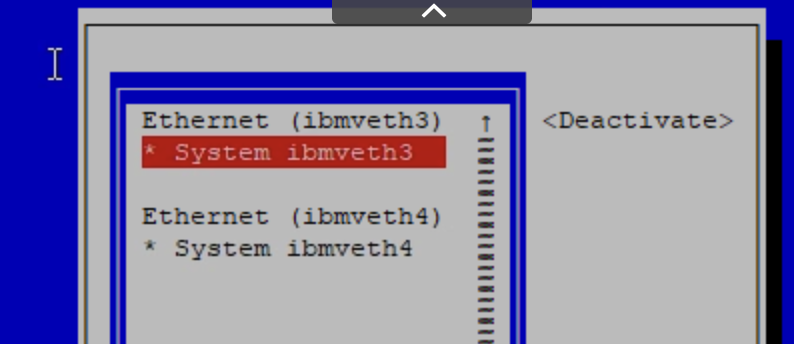
*Note: We could have used
the CLI to do this, but we were in a nmtui mood at the time ;)
We then rebooted the novalink VM. After about 5-10 minutes, the RMC connections started to show as “active” in the pvmctl output.
Additionally, we had to manually change MGMTSWITCH from Veb
to Vepa mode. The /usr/bin/conf_private_network created
the switch as Veb.
# pvmctl
vswitch update -i switch_id=1 -s mode=Vepa
# pvmctl
vswitch list
Virtual
Switches
+------------+----+------+---------------------+
| Name
| ID | Mode | VNets |
+------------+----+------+---------------------+
|
ETHERNET0 | 0 | Veb
| VLAN3-ETHERNET0 |
| MGMTSWITCH
| 1 | Vepa | VLAN4094-MGMTSWITCH
|
+------------+----+------+---------------------+
We noticed that the Novalink LPAR Trunk was set to False,
not True. We expected it to be True but the development team
explained that this is OK.
# pvmctl
eth list | grep MG
|
4094 | MGMTSWITCH | 2 | 0AE7A733C8EC | 4 |
False | |
|
4094 | MGMTSWITCH | 1 | D60901F44927 | 7 | False
| |